The Ultimate Boozy Treat: How to Make the Best Classic Rum Balls
Rum balls are the quintessential holiday confection. They are sophisticated, deceptively simple to prepare, and carry a nostalgic charm that bridges the gap between a high-end truffle and a homemade cookie. Unlike many holiday desserts that require precise oven temperatures and lengthy cooling times, rum balls are a “no-bake” wonder, relying on high-quality ingredients and a bit of patience while they mature in the refrigerator.
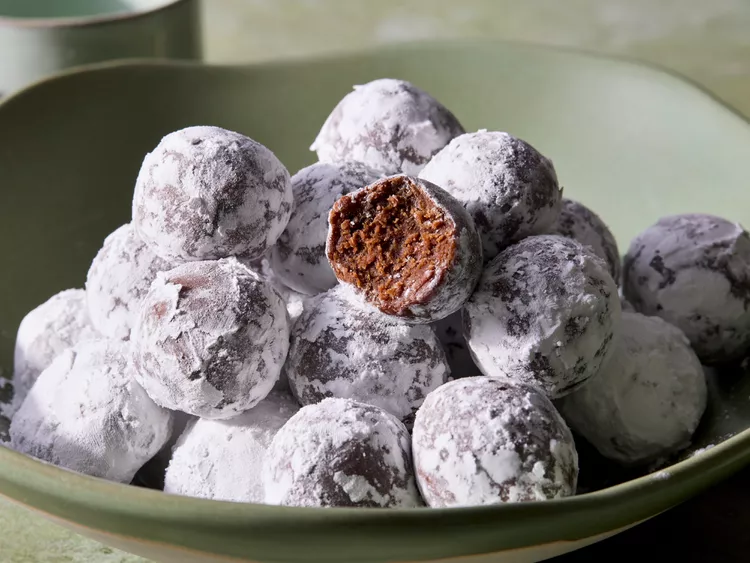
This recipe delivers a rum ball with a dense, fudgy interior, a balanced kick of dark rum, and a crisp outer coating. By focusing on the architecture of the flavors—toasted nuts, high-fat cocoa, and deep, molasses-forward rum—we move beyond the overly sweet versions of the past and into a professional-grade dessert.
Why This Recipe Works
The secret to a truly superior rum ball lies in the texture and the “cure.” Using crushed vanilla wafers or high-quality biscuits provides a neutral, crumbly base that absorbs the liquid without becoming mushy. The addition of honey or corn syrup ensures a chewy, truffle-like consistency, while a pinch of salt and Dutch-processed cocoa powder creates a complex chocolate profile that stands up to the potency of the alcohol.
Furthermore, we utilize a aging process. While you can eat these immediately, allowing them to rest for 24 to 48 hours allows the sharp edges of the rum to soften, melding with the chocolate and sugar into a cohesive, mellow flavor.
Ingredients
To achieve the best results, ensure your ingredients are at room temperature before beginning. This helps the honey and melted chocolate (if using) incorporate seamlessly into the dry crumbs.
The Base
-
11 oz Vanilla Wafers: Approximately one standard box, crushed into fine crumbs.
-
1 cup Pecans or Walnuts: Finely chopped and lightly toasted.
-
1 cup Confectioners’ Sugar: Sifted to remove lumps.
-
1/4 cup Dutch-processed Cocoa Powder: Sifted (Dutch-processed provides a darker, smoother chocolate flavor).
The Bind
-
1/2 cup Dark Rum: Choose a high-quality aged rum or spiced rum for depth.
-
3 tbsp Light Corn Syrup or Honey: This provides the necessary “chew.”
-
1/4 tsp Fine Sea Salt: To balance the sweetness.
The Coating
-
1/2 cup Granulated Sugar: For a classic crunch.
-
Optional: Additional cocoa powder, sprinkles, or melted dark chocolate for dipping.
Step-by-Step Instructions
1. Prepare the Dry Base
In a large mixing bowl, combine the finely crushed vanilla wafer crumbs, the sifted confectioners’ sugar, and the sifted cocoa powder. Use a whisk to ensure the cocoa is evenly distributed through the crumbs to prevent dark streaks in the final product.
2. Toast and Process the Nuts
Place your pecans or walnuts in a dry skillet over medium heat for 3–5 minutes, stirring constantly until they are fragrant and golden. Once cooled, pulse them in a food processor until they are fine but not greasy (avoid turning them into nut butter). Fold the nuts into the dry crumb mixture.
3. Incorporate the Liquid Ingredients
In a separate small bowl or measuring cup, whisk together the dark rum, the corn syrup (or honey), and the sea salt. Gradually pour the liquid mixture over the dry ingredients.
4. Mix Until Cohesive
Using a sturdy spatula or your hands, mix the dough until it is well combined. The mixture should feel like damp sand that holds its shape when squeezed. If the mixture feels too dry to hold together, add more rum or water one teaspoon at a time. If it feels too wet, add a tablespoon more of crushed wafers.
5. Shape the Rum Balls
Scoop about one tablespoon of the mixture at a time (a small cookie scoop is ideal for uniformity). Roll the mixture between your palms to create a smooth, round ball, roughly 1 inch in diameter.
6. Coat and Finish
Immediately roll each ball in your chosen coating while the surface is still slightly tacky.
-
For a classic look: Roll in granulated sugar.
-
For a modern look: Roll in extra cocoa powder or finely desiccated coconut.
-
For an indulgent finish: Chill the balls for 30 minutes, then dip them in tempered dark chocolate.
7. The Curing Process
Place the finished rum balls in an airtight container, separating layers with parchment paper. Store them in the refrigerator for at least 24 hours before serving. This is the most critical step for flavor development.
Expert Tips & Variations
Choosing the Right Rum
The rum is the star of the show, so avoid “white” or silver rums, which can taste overly medicinal in this application. Look for an aged dark rum with notes of caramel, vanilla, and oak. If you prefer a warmer profile, a spiced rum works beautifully against the toasted pecans.
Texture Control
If you prefer a denser, more “fudgy” rum ball, you can replace half of the vanilla wafer crumbs with crushed chocolate sandwich cookies (cream filling removed). For a gluten-free version, simply substitute the vanilla wafers with your favorite gluten-free shortbread or digestive biscuit.
Alcohol-Free Variation
If you are serving guests who do not consume alcohol, you can replace the rum with an equal amount of orange juice or a strong brewed coffee. Add a teaspoon of rum extract to maintain that signature flavor profile without the alcohol content.
Substitution Table
| Ingredient | Substitute | Effect on Flavor/Texture |
| Vanilla Wafers | Graham Crackers | Heartier, slightly more cinnamon notes. |
| Pecans | Hazelnuts | Creates a “Nutella-like” sophisticated profile. |
| Dark Rum | Bourbon | A woodier, smokier flavor; less sweet. |
| Corn Syrup | Maple Syrup | Thinner consistency; adds a distinct autumnal flavor. |
Serving Suggestions
Rum balls are best served at cool room temperature. If served directly from the fridge, the fats in the nuts and cocoa can feel a bit waxy; giving them 15 minutes on a serving platter allows the texture to soften into a melt-in-the-mouth fudge.
Pairing Notes:
-
Coffee: The bitterness of a dark roast espresso perfectly offsets the sugar coating.
-
After-Dinner Drinks: Serve alongside a glass of the same rum used in the recipe or a tawny port.
-
Platter Presentation: Arrange them on a silver tray with fresh sprigs of mint or dehydrated orange slices for a professional holiday aesthetic.
Storage & Make-Ahead Notes
One of the greatest advantages of rum balls is their incredible shelf life. Because of the high sugar and alcohol content, they act as their own preservative.
-
Refrigeration: Store in an airtight container for up to 3 weeks. They actually improve in flavor over the first 7 days.
-
Freezing: Rum balls freeze exceptionally well. Place them in a freezer-safe bag or container for up to 3 months. To serve, thaw them overnight in the refrigerator.
-
Make-Ahead: These are the perfect “prep-ahead” dessert. Make them a week before your event to save time during busy hosting periods.
Nutrition Information
Yields: 24 Rum Balls | Serving Size: 1 Ball
| Nutrient | Amount Per Serving |
| Calories | 115 kcal |
| Protein | 1g |
| Fat | 5g |
| Saturated Fat | 1g |
| Carbohydrates | 14g |
| Fiber | 1g |
| Sugar | 9g |
| Sodium | 45mg |
Note: Nutritional values are estimates based on standard ingredient data and may vary depending on the specific brand of biscuits or rum used.